Extending The Unity Procedural Skybox
Skyboxes can be a great way to add a sense of place to a game, and a procedural one can be a great way to create lots of different environments by just adjusting some material properties. However, they can be a little complicated to get right.
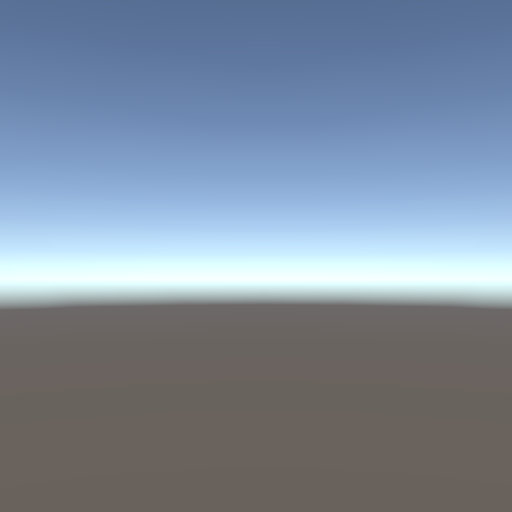
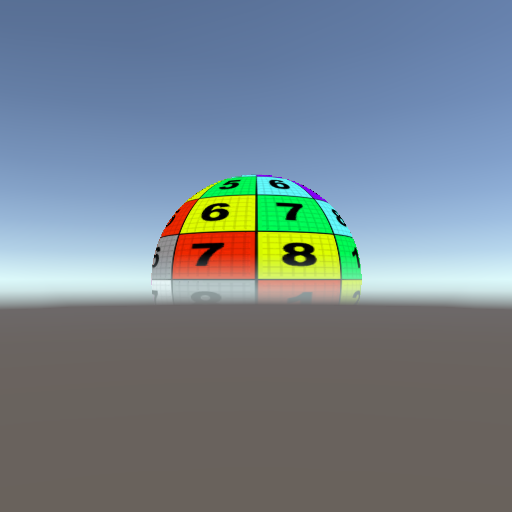
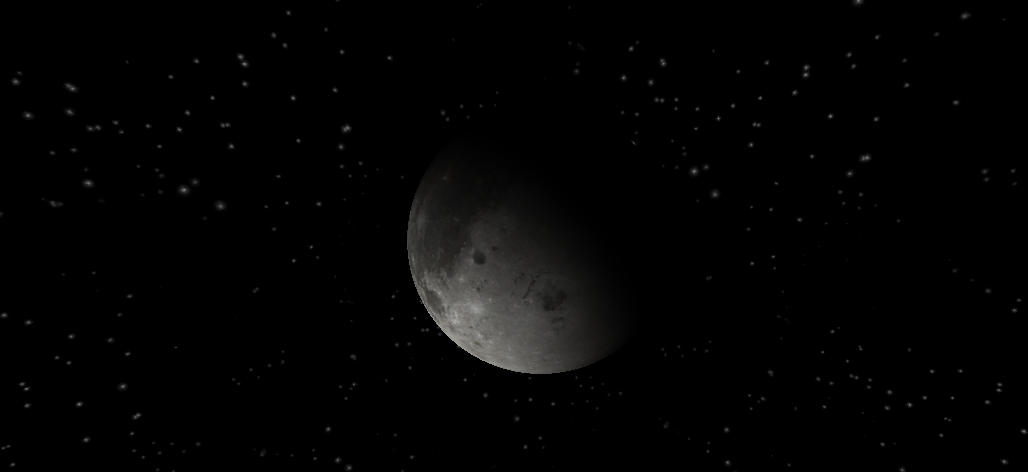
I have messed around with a lot of different techniques for making procedural skyboxes but I think I have landed on what is my favorite of all the versions I have made. In this post I will show you how to create a great skybox that has a lot of cool customizable features, like the one below.

An example of what you can do with procedural skyboxes and what our final shader will look like.
Part 1: Background on Skies
Skies in the real world have a lot of aspects to them that we can think of and try to replicate. For example, the color of the sky, the desaturation of that color as you look to the horizon, sunsets. It is not too difficult to come up with some math and slap it into a shader to replicate these aspects of a sky. However, in my experience they often work best when you know exactly what you want and can work backwards to figure out how you can fake that inside of a shader. Which in a lot of cases is fine but I think we can do better, and a lot of people have.
The way skies look is due to what is known as light scattering. As light passes through the atmosphere it gets redirected in all sorts of directions by small particles floating in the air. This refracts different wave lengths of light in different directions and is why the sky is blue, blue light gets refracted towards your eye while other colors are refracted away from your eye. And as it turns out the math behind how this work is incredibly complicated. For real time graphics, trying to implement this exactly is practically impossible. However, if we can approximate it, we can get the result we want at an acceptable computational cost. As it turns out people have been working on this for a while and the folks at NVIDIA have come up with a great method you can read about here, which I recommend reading.
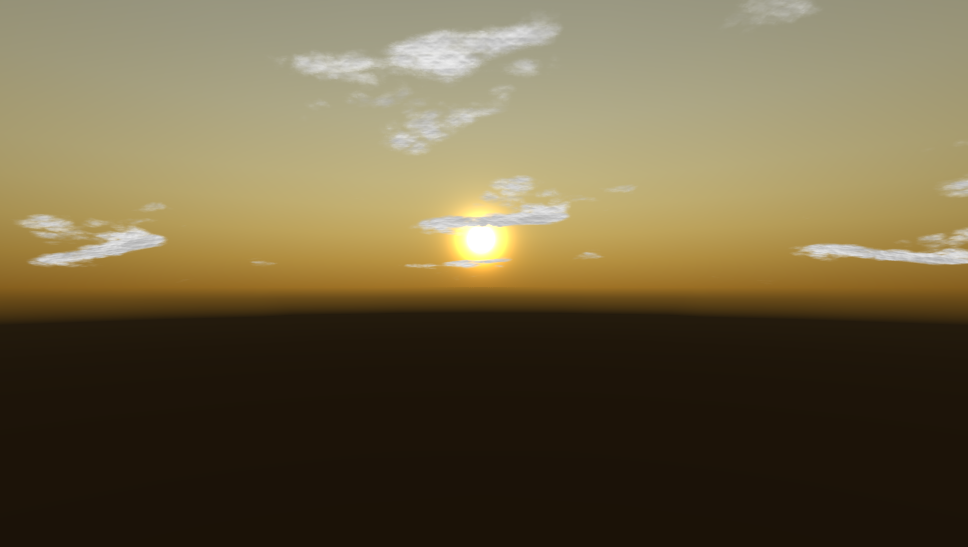
With good light scattering you can simulate awesome aspects of the sky like a sunset.
Anyway, there is no reason to reinvent the wheel here. The work has already been done to approximate this effect and Unity has a shader that uses this approximation to create a realistic looking sky like the one you can see above. I am not going to explain how this works, if you read the NVIDIA article and compare it to Unity’s shader you will be able to connect the dots. What we are going to do is extend this shader to add cool things like clouds, stars, and a textured moon object.
Part 2: The Setup
So, to get started head over to the Unity archive find the version of Unity you are using, click on the drop-down menu and download the built-in shaders. I am using 2019.4 at the moment, but it probably isn’t super important. Besides using the skybox shader, this is a great resource to explore some code and learn how shaders work, so I recommend having a copy of this available at any time.
Once you have downloaded the files create a new Unity project, create a shader and material folder. In the shader folder add another folder and call it Includes
.
Spelling here is important so make sure you name it correctly, or name it whatever you want and make the appropriate changes as we go.
In the shader folder create a new Unlit shader, name it whatever you want, and open it up. Go ahead and delete everything in the property block, the fog multi-compile line,
everything from the appdata and v2f structs, all declared variables, and everything out of the vert and frag functions.
Shader "Feral_Pug/SkyBox/MyProceduralSkybox"
{
    Properties
    {

    }
    SubShader
    {
        Tags { "RenderType"="Opaque" }
        LOD 100

        Pass
        {
            CGPROGRAM
            #pragma vertex vert
            #pragma fragment frag

            #include "UnityCG.cginc"

            struct appdata
            {

            };

            struct v2f
            {

            };


            v2f vert (appdata v)
            {

            }

            fixed4 frag (v2f i) : SV_Target
            {

            }
        ENDCG
        }
    }
}
A gutted shader with the general setup that we will use to build our shader with.
Now go to the file you downloaded and look in the DefaultResourcesExtra folder for the Skybox-Procedural.shader file and open it. We are going to take a lot of this
code and put it in a separate include file so that our shader doesn’t get cluttered. Because Unity doesn’t have a way to do this in the editor, go to the
Includes folder you created outside of Unity and add a text file to that folder and name it Scattering
. Then right click it, go to properties, and change the
.txt
file extension to .cginc
. Go to Unity and open the Scattering.cginc
include file.
First thing we are going to do is add a define check to make sure we don’t ever include this file twice. Add the following to the top of the empty include file. This is something you should always do when using include files as including them multiple times will cause redefinition compiler errors.
#ifndef SCATTERING
    #define SCATTERING

#endif
A simple way to guard against including a file twice, which will cause an error.
Everything we add to this will go in between the #define SCATTERING and the #endif lines. First, we will grab everything
from the #if defined(UNITY_COLORSPACE_GAMMA) line to the end of the getRayleighPhase method declaration.
#ifndef SCATTERING
    #define SCATTERING

        #if defined(UNITY_COLORSPACE_GAMMA)
        #define GAMMA 2
        #define COLOR_2_GAMMA(color) color
        #define COLOR_2_LINEAR(color) color*color
        #define LINEAR_2_OUTPUT(color) sqrt(color)
    #else
        #define GAMMA 2.2
        // HACK: to get gfx-tests in Gamma mode to agree until UNITY_ACTIVE_COLORSPACE_IS_GAMMA is working properly
        #define COLOR_2_GAMMA(color) ((unity_ColorSpaceDouble.r>2.0) ? pow(color,1.0/GAMMA) : color)
        #define COLOR_2_LINEAR(color) color
        #define LINEAR_2_LINEAR(color) color
    #endif

    // RGB wavelengths
    // .35 (.62=158), .43 (.68=174), .525 (.75=190)
    static const float3 kDefaultScatteringWavelength = float3(.65, .57, .475);
    static const float3 kVariableRangeForScatteringWavelength = float3(.15, .15, .15);

    #define OUTER_RADIUS 1.025
    static const float kOuterRadius = OUTER_RADIUS;
    static const float kOuterRadius2 = OUTER_RADIUS * OUTER_RADIUS;
    static const float kInnerRadius = 1.0;
    static const float kInnerRadius2 = 1.0;

    static const float kCameraHeight = 0.0001;

    #define kRAYLEIGH (lerp(0.0, 0.0025, pow(_AtmosphereThickness,2.5)))      // Rayleigh constant
    #define kMIE 0.0010             // Mie constant
    #define kSUN_BRIGHTNESS 20.0    // Sun brightness

    #define kMAX_SCATTER 50.0 // Maximum scattering value, to prevent math overflows on Adrenos

    static const half kHDSundiskIntensityFactor = 15.0;
    static const half kSimpleSundiskIntensityFactor = 27.0;

    static const half kSunScale = 400.0 * kSUN_BRIGHTNESS;
    static const float kKmESun = kMIE * kSUN_BRIGHTNESS;
    static const float kKm4PI = kMIE * 4.0 * 3.14159265;
    static const float kScale = 1.0 / (OUTER_RADIUS - 1.0);
    static const float kScaleDepth = 0.25;
    static const float kScaleOverScaleDepth = (1.0 / (OUTER_RADIUS - 1.0)) / 0.25;
    static const float kSamples = 2.0; // THIS IS UNROLLED MANUALLY, DON'T TOUCH

    #define MIE_G (-0.990)
    #define MIE_G2 0.9801

    #define SKY_GROUND_THRESHOLD 0.02

    // fine tuning of performance. You can override defines here if you want some specific setup
    // or keep as is and allow later code to set it according to target api

    // if set vprog will output color in final color space (instead of linear always)
    // in case of rendering in gamma mode that means that we will do lerps in gamma mode too, so there will be tiny difference around horizon
    // #define SKYBOX_COLOR_IN_TARGET_COLOR_SPACE 0

    // sun disk rendering:
    // no sun disk - the fastest option
    #define SKYBOX_SUNDISK_NONE 0
    // simplistic sun disk - without mie phase function
    #define SKYBOX_SUNDISK_SIMPLE 1
    // full calculation - uses mie phase function
    #define SKYBOX_SUNDISK_HQ 2

    // uncomment this line and change SKYBOX_SUNDISK_SIMPLE to override material settings
    // #define SKYBOX_SUNDISK SKYBOX_SUNDISK_SIMPLE

    #ifndef SKYBOX_SUNDISK
    #if defined(_SUNDISK_NONE)
        #define SKYBOX_SUNDISK SKYBOX_SUNDISK_NONE
    #elif defined(_SUNDISK_SIMPLE)
        #define SKYBOX_SUNDISK SKYBOX_SUNDISK_SIMPLE
    #else
        #define SKYBOX_SUNDISK SKYBOX_SUNDISK_HQ
    #endif
    #endif

    #ifndef SKYBOX_COLOR_IN_TARGET_COLOR_SPACE
        #if defined(SHADER_API_MOBILE)
            #define SKYBOX_COLOR_IN_TARGET_COLOR_SPACE 1
        #else
            #define SKYBOX_COLOR_IN_TARGET_COLOR_SPACE 0
        #endif
    #endif

    // Calculates the Rayleigh phase function
    half getRayleighPhase(half eyeCos2)
    {
        return 0.75 + 0.75 * eyeCos2;
    }

    half getRayleighPhase(half3 light, half3 ray)
    {
        half eyeCos = dot(light, ray);
        return getRayleighPhase(eyeCos * eyeCos);
    }
#endif
Everything in between our #define SCATTERING
and #endif
has been stripped out of the Unity procedural skybox shader and added to our
include file. Your include file should look just like this. We have just a few more things to rip out and one or two changes to make to the code.
We still have to rip out the scale function just above the vert method declaration, the getMiePhase method,
and the calcSunAttenuation method that are just above the frag function. Add those now to the bottom of our include file.
float scale(float inCos)
{
    float x = 1.0 - inCos;
    return 0.25 * exp(-0.00287 + x * (0.459 + x * (3.83 + x * (-6.80 + x * 5.25))));
}

// Calculates the Mie phase function
half getMiePhase(half eyeCos, half eyeCos2)
{
    half temp = 1.0 + MIE_G2 - 2.0 * MIE_G * eyeCos;
    temp = pow(temp, pow(_SunSize, 0.65) * 10);
    temp = max(temp, 1.0e-4); // prevent division by zero, esp. in half precision
    temp = 1.5 * ((1.0 - MIE_G2) / (2.0 + MIE_G2)) * (1.0 + eyeCos2) / temp;
    #if defined(UNITY_COLORSPACE_GAMMA) && SKYBOX_COLOR_IN_TARGET_COLOR_SPACE
        temp = pow(temp, .454545);
    #endif
    return temp;
}

// Calculates the sun shape
half calcSunAttenuation(half3 lightPos, half3 ray)
{
    #if SKYBOX_SUNDISK == SKYBOX_SUNDISK_SIMPLE
        half3 delta = lightPos - ray;
        half dist = length(delta);
        half spot = 1.0 - smoothstep(0.0, _SunSize, dist);
        return spot * spot;
    #else // SKYBOX_SUNDISK_HQ
        half focusedEyeCos = pow(saturate(dot(lightPos, ray)), _SunSizeConvergence);
        return getMiePhase(-focusedEyeCos, focusedEyeCos * focusedEyeCos);
    #endif
}
Almost finished with setting up the include file. It seems like a lot of work, but it will be much nicer to work with our shader once this is all out of the way.
All we have left to do is change a few of the methods. Some of the methods reference properties on our shader. While this is not really a problem, your IDE, like Visual Studio, will keep complaining about it and I find it very annoying. All we have to do is replace these with parameters we will add to these functions and then remember to add those parameters to where they are used in the shader.
float scale(float inCos)
{
    float x = 1.0 - inCos;
    return 0.25 * exp(-0.00287 + x * (0.459 + x * (3.83 + x * (-6.80 + x * 5.25))));
}

// Calculates the Mie phase function
half getMiePhase(half eyeCos, half eyeCos2, float SunSize)
{
    half temp = 1.0 + MIE_G2 - 2.0 * MIE_G * eyeCos;
    temp = pow(temp, pow(SunSize, 0.65) * 10);
    temp = max(temp, 1.0e-4); // prevent division by zero, esp. in half precision
    temp = 1.5 * ((1.0 - MIE_G2) / (2.0 + MIE_G2)) * (1.0 + eyeCos2) / temp;
    #if defined(UNITY_COLORSPACE_GAMMA) && SKYBOX_COLOR_IN_TARGET_COLOR_SPACE
        temp = pow(temp, .454545);
    #endif
    return temp;
}

// Calculates the sun shape
half calcSunAttenuation(half3 lightPos, half3 ray, float SunSize, float SunSizeConvergence)
{
    #if SKYBOX_SUNDISK == SKYBOX_SUNDISK_SIMPLE
        half3 delta = lightPos - ray;
        half dist = length(delta);
        half spot = 1.0 - smoothstep(0.0, SunSize, dist);
        return spot * spot;
    #else // SKYBOX_SUNDISK_HQ
        half focusedEyeCos = pow(saturate(dot(lightPos, ray)), SunSizeConvergence);
        return getMiePhase(-focusedEyeCos, focusedEyeCos * focusedEyeCos, SunSize);
    #endif
}
And we are done. We have just made the highlighted changes to our include file. You can close this and never look at it again.
Now the last thing we have to do to recreate the Unity procedural skybox and get to extending it is to change the rendering mode, queue and preview, set Cull and Zwrite to off, add all the properties, include files, pragma statements, property variable declarations, vert and fragment data structures, and the vert and frag programs themselves.
First, we change the rendering queue and type to Background
. This is to tell the shader to render this first. In Unity, what ever the background is for the camera gets
rendered first, so that any pixel that does not get drawn will at least get the background drawn there. If our camera is set to draw the skybox as the background, Unity will
hook up the camera with the skybox material and draw it accordingly. The preview tag just changes how it’s preview looks in the inspector.
We do not to want cull any part of skybox. I am not exactly sure how Unity draws the Skybox. My guess is that it draws a mesh that is equal to the view frustrum of the camera, and so we would likely be drawing back faces. But if Unity sets their skybox to have no culling we will do the same. They probably know better. We also do not want to write to the Zbuffer as we would want any geometry or transparent objects in the view of the camera to draw instead of the skybox. It probably doesn’t matter as anything beyond the skybox should be out of the camera’s view, but I suppose it saves the render pipeline from having to write to the z-buffer.
We also need to include our Scattering.cginc
file as that is where all the functions now live and we also have to add the _SunSize
and _SunSizeConvergence
to the parameters list for the calcSunAttenuation
method call in the frag function.
Shader "Feral_Pug/SkyBox/MyProceduralSkybox"
{
    Properties
    {
        [KeywordEnum(None, Simple, High Quality)] _SunDisk ("Sun", Int) = 2
        _SunSize ("Sun Size", Range(0,1)) = 0.04
        _SunSizeConvergence("Sun Size Convergence", Range(1,10)) = 5

        _AtmosphereThickness ("Atmosphere Thickness", Range(0,5)) = 1.0
        _SkyTint ("Sky Tint", Color) = (.5, .5, .5, 1)
        _GroundColor ("Ground", Color) = (.369, .349, .341, 1)

        _Exposure("Exposure", Range(0, 8)) = 1.3

    }
    SubShader
    {
        Tags { "Queue"="Background" "RenderType"="Background" "PreviewType"="Skybox" }
        Cull Off ZWrite Off

        Pass
        {
            CGPROGRAM
            #pragma vertex vert
            #pragma fragment frag

            #include "UnityCG.cginc"
            #include "Lighting.cginc"
            #include "Includes/Scattering.cginc"

            #pragma multi_compile_local _SUNDISK_NONE _SUNDISK_SIMPLE _SUNDISK_HIGH_QUALITY

            uniform half _Exposure;     // HDR exposure
            uniform half3 _GroundColor;
            uniform half _SunSize;
            uniform half _SunSizeConvergence;
            uniform half3 _SkyTint;
            uniform half _AtmosphereThickness;

            struct appdata
            {
                float4 vertex : POSITION;
                UNITY_VERTEX_INPUT_INSTANCE_ID
            };

            struct v2f
            {
                float4  pos             : SV_POSITION;

                #if SKYBOX_SUNDISK == SKYBOX_SUNDISK_HQ
                    // for HQ sun disk, we need vertex itself to calculate ray-dir per-pixel
                    float3  vertex          : TEXCOORD0;
                #elif SKYBOX_SUNDISK == SKYBOX_SUNDISK_SIMPLE
                    half3   rayDir          : TEXCOORD0;
                #else
                    // as we dont need sun disk we need just rayDir.y (sky/ground threshold)
                    half    skyGroundFactor : TEXCOORD0;
                #endif

                // calculate sky colors in vprog
                half3   groundColor     : TEXCOORD1;
                half3   skyColor        : TEXCOORD2;

                #if SKYBOX_SUNDISK != SKYBOX_SUNDISK_NONE
                    half3   sunColor        : TEXCOORD3;
                #endif

                UNITY_VERTEX_OUTPUT_STEREO
            };

            v2f vert (appdata v)
            {
                v2f OUT;
                UNITY_SETUP_INSTANCE_ID(v);
                UNITY_INITIALIZE_VERTEX_OUTPUT_STEREO(OUT);
                OUT.pos = UnityObjectToClipPos(v.vertex);

                float3 kSkyTintInGammaSpace = COLOR_2_GAMMA(_SkyTint); // convert tint from Linear back to Gamma
                float3 kScatteringWavelength = lerp (
                    kDefaultScatteringWavelength-kVariableRangeForScatteringWavelength,
                    kDefaultScatteringWavelength+kVariableRangeForScatteringWavelength,
                    half3(1,1,1) - kSkyTintInGammaSpace); // using Tint in sRGB gamma allows for more visually linear interpolation and to keep (.5) at (128, gray in sRGB) point
                float3 kInvWavelength = 1.0 / pow(kScatteringWavelength, 4);

                float kKrESun = kRAYLEIGH * kSUN_BRIGHTNESS;
                float kKr4PI = kRAYLEIGH * 4.0 * 3.14159265;

                float3 cameraPos = float3(0,kInnerRadius + kCameraHeight,0);    // The camera's current position

                // Get the ray from the camera to the vertex and its length (which is the far point of the ray passing through the atmosphere)
                float3 eyeRay = normalize(mul((float3x3)unity_ObjectToWorld, v.vertex.xyz));

                float far = 0.0;
                half3 cIn, cOut;

                if(eyeRay.y >= 0.0)
                {
                    // Sky
                    // Calculate the length of the "atmosphere"
                    far = sqrt(kOuterRadius2 + kInnerRadius2 * eyeRay.y * eyeRay.y - kInnerRadius2) - kInnerRadius * eyeRay.y;

                    float3 pos = cameraPos + far * eyeRay;

                    // Calculate the ray's starting position, then calculate its scattering offset
                    float height = kInnerRadius + kCameraHeight;
                    float depth = exp(kScaleOverScaleDepth * (-kCameraHeight));
                    float startAngle = dot(eyeRay, cameraPos) / height;
                    float startOffset = depth*scale(startAngle);


                    // Initialize the scattering loop variables
                    float sampleLength = far / kSamples;
                    float scaledLength = sampleLength * kScale;
                    float3 sampleRay = eyeRay * sampleLength;
                    float3 samplePoint = cameraPos + sampleRay * 0.5;

                    // Now loop through the sample rays
                    float3 frontColor = float3(0.0, 0.0, 0.0);
                    // Weird workaround: WP8 and desktop FL_9_3 do not like the for loop here
                    // (but an almost identical loop is perfectly fine in the ground calculations below)
                    // Just unrolling this manually seems to make everything fine again.
    //              for(int i=0; i<int(kSamples); i++)
                    {
                        float height=length(samplePoint);
                        float depth=exp(kScaleOverScaleDepth * (kInnerRadius - height));
                        float lightAngle=dot(_WorldSpaceLightPos0.xyz, samplePoint) / height;
                        float cameraAngle=dot(eyeRay, samplePoint) / height;
                        float scatter=(startOffset + depth*(scale(lightAngle) - scale(cameraAngle)));
                        float3 attenuate=exp(-clamp(scatter, 0.0, kMAX_SCATTER) * (kInvWavelength * kKr4PI + kKm4PI));
                        frontColor +=attenuate * (depth * scaledLength);
                        >samplePoint +=sampleRay;
                    }
                    {
                        float height=length(samplePoint);
                        float depth=exp(kScaleOverScaleDepth * (kInnerRadius - height));
                        float lightAngle=dot(_WorldSpaceLightPos0.xyz, samplePoint) / height;
                        float cameraAngle=dot(eyeRay, samplePoint) / height;
                        float scatter=(startOffset + depth*(scale(lightAngle) - scale(cameraAngle)));
                        float3 attenuate=exp(-clamp(scatter, 0.0, kMAX_SCATTER) * (kInvWavelength * kKr4PI + kKm4PI));
                        frontColor +=attenuate * (depth * scaledLength);
                        samplePoint +=sampleRay;
                    }
                    // Finally, scale the Mie and Rayleigh colors and set up the varying variables for the pixel shader
                    cIn=frontColor * (kInvWavelength * kKrESun);
                    cOut=frontColor * kKmESun;
                }
                else
                {
                    // Ground
                    far=(-kCameraHeight) / (min(-0.001, eyeRay.y));
                    float3 pos=cameraPos + far * eyeRay;
                    // Calculate the ray's starting position, then calculate its scattering offset
                    float depth=exp((-kCameraHeight) * (1.0 /kScaleDepth));
                    float cameraAngle=dot(-eyeRay, pos);
                    float lightAngle=dot(_WorldSpaceLightPos0.xyz, pos);
                    float cameraScale=scale(cameraAngle);
                    float lightScale=scale(lightAngle);
                    float cameraOffset=depth*cameraScale;
                    float temp=(lightScale + cameraScale);
                    // Initialize the scattering loop variables
                    float sampleLength=far / kSamples;
                    float scaledLength=sampleLength * kScale;
                    float3 sampleRay=eyeRay * sampleLength;
                    float3 samplePoint=cameraPos + sampleRay * 0.5;
                    // Now loop through the sample rays
                    float3 frontColor=float3(0.0, 0.0, 0.0);
                    float3 attenuate;
                // for(int i=0; i<int(kSamples); i++) // Loop removed because we kept hitting SM2.0 temp variable limits. Doesn't affect the image too much.
                    {
                        float height = length(samplePoint);
                        float depth = exp(kScaleOverScaleDepth * (kInnerRadius - height));
                        float scatter = depth*temp - cameraOffset;
                        attenuate = exp(-clamp(scatter, 0.0, kMAX_SCATTER) * (kInvWavelength * kKr4PI + kKm4PI));
                        frontColor += attenuate * (depth * scaledLength)
                        samplePoint += sampleRay;
                    }

                    cIn = frontColor * (kInvWavelength * kKrESun + kKmESun);
                    cOut = clamp(attenuate, 0.0, 1.0);
                }

                #if SKYBOX_SUNDISK == SKYBOX_SUNDISK_HQ
                    OUT.vertex          = -eyeRay;
                #elif SKYBOX_SUNDISK == SKYBOX_SUNDISK_SIMPLE
                    OUT.rayDir          = half3(-eyeRay);
                #else
                    OUT.skyGroundFactor = -eyeRay.y / SKY_GROUND_THRESHOLD;
                #endif

                // if we want to calculate color in vprog:
                // 1. in case of linear: multiply by _Exposure in here (even in case of lerp it will be common multiplier, so we can skip mul in fshader)
                // 2. in case of gamma and SKYBOX_COLOR_IN_TARGET_COLOR_SPACE: do sqrt right away instead of doing that in fshader

                OUT.groundColor = _Exposure * (cIn + COLOR_2_LINEAR(_GroundColor) * cOut);
                OUT.skyColor    = _Exposure * (cIn * getRayleighPhase(_WorldSpaceLightPos0.xyz, -eyeRay));

                #if SKYBOX_SUNDISK != SKYBOX_SUNDISK_NONE
                    // The sun should have a stable intensity in its course in the sky. Moreover it should match the highlight of a purely specular material.
                    // This matching was done using the standard shader BRDF1 on the 5/31/2017
                    // Finally we want the sun to be always bright even in LDR thus the normalization of the lightColor for low intensity.
                    half lightColorIntensity = clamp(length(_LightColor0.xyz), 0.25, 1);
                    #if SKYBOX_SUNDISK == SKYBOX_SUNDISK_SIMPLE
                        OUT.sunColor    = kSimpleSundiskIntensityFactor * saturate(cOut * kSunScale) * _LightColor0.xyz / lightColorIntensity;
                    #else // SKYBOX_SUNDISK_HQ
                        OUT.sunColor    = kHDSundiskIntensityFactor * saturate(cOut) * _LightColor0.xyz / lightColorIntensity;
                    #endif

                #endif

                #if defined(UNITY_COLORSPACE_GAMMA) && SKYBOX_COLOR_IN_TARGET_COLOR_SPACE
                    OUT.groundColor = sqrt(OUT.groundColor);
                    OUT.skyColor    = sqrt(OUT.skyColor);
                    #if SKYBOX_SUNDISK != SKYBOX_SUNDISK_NONE
                        OUT.sunColor= sqrt(OUT.sunColor);
                    #endif
                #endif

                return OUT;
            }

            fixed4 frag (v2f IN) : SV_Target
            {
                half3 col = half3(0.0, 0.0, 0.0);

                // if y > 1 [eyeRay.y < -SKY_GROUND_THRESHOLD] - ground
                // if y >= 0 and < 1 [eyeRay.y <= 0 and > -SKY_GROUND_THRESHOLD] - horizon
                // if y < 0 [eyeRay.y > 0] - sky
                #if SKYBOX_SUNDISK == SKYBOX_SUNDISK_HQ
                    half3 ray = normalize(IN.vertex.xyz);
                    half y = ray.y / SKY_GROUND_THRESHOLD;
                #elif SKYBOX_SUNDISK == SKYBOX_SUNDISK_SIMPLE
                    half3 ray = IN.rayDir.xyz;
                    half y = ray.y / SKY_GROUND_THRESHOLD;
                #else
                    half y = IN.skyGroundFactor;
                #endif

                // if we did precalculate color in vprog: just do lerp between them
                col = lerp(IN.skyColor, IN.groundColor, saturate(y));

                #if SKYBOX_SUNDISK != SKYBOX_SUNDISK_NONE
                    if(y < 0.0)
                    {
                        col += IN.sunColor * calcSunAttenuation(_WorldSpaceLightPos0.xyz, -ray, _SunSize, _SunSizeConvergence);
                    }
                #endif

                #if defined(UNITY_COLORSPACE_GAMMA) && !SKYBOX_COLOR_IN_TARGET_COLOR_SPACE
                    col = LINEAR_2_OUTPUT(col);
                #endif

                return half4(col,1.0);
            }
        ENDCG
        }
    }
}
Now we have a cleaned-up version of the Unity procedural skybox shader and we can finally start to get to work. Do not forget to add those parameters
to the calcSunAttenuation
call in the frag function.
OK, now we are finished with setting up our shader. I know that was a lot so if you want you can just grab the completed version of this step from my
GitHub here.
Just remember the include file has to go into a folder named Includes
in the same directory as the shader
or you will have to change the file path on the include statement for our Scattering.cginc
include file.
Part 3: Adding Stars
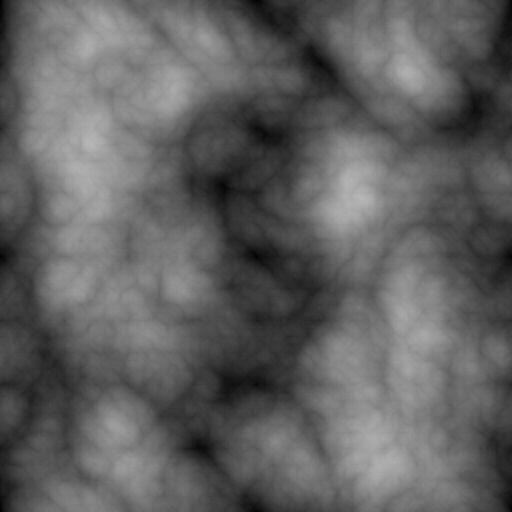
The first thing we will add is stars. This is relatively simple, so it seems like a good place to start. To get stars we will use a Voronoi texture. You can easily make one yourself in whatever software you like, I use GIMP, or you can use the one I made by going to my GitHub here. In GIMP all you have to do is create a new image and go to Filters > Render > Noise > Cell Noise. Play around with the settings until you have one you like. Then when you are done go back to Filters and find Map > Tile Seamless. Keep the opacity at 100 and hit OK. Export it as you like, and you are all set to go. When you are done import it into Unity.
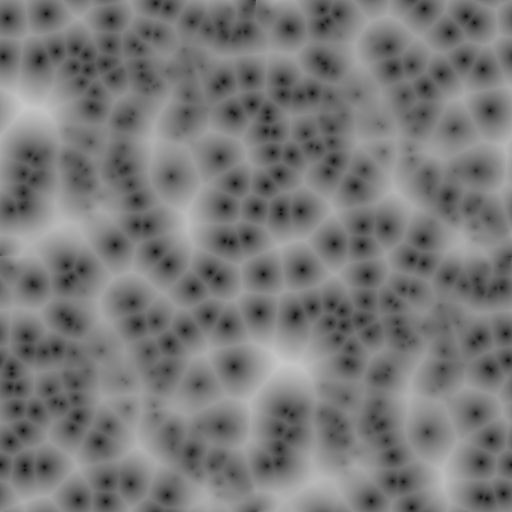
This is the Voronoi Texture that I used.
To be able to use this texture we have to come up with a way to get UVs to sample the texture within our shader. To do this we will get the world space position of the current pixel we are working on, normalize it, and use that direction generate UV coordinates. I have seen lots of examples of turning this direction into spherical coordinates using some trigonometry, which we will do when we make our moon, but this makes for bad samples around the poles. A better way, and a lot simpler, is to just divide the and X and Z coordinates of our direction by the Y of our direction. This essentially projects our direction on to a plane that sits directly on top of the sphere we are calling our skybox and is orientated facing up. And we can take this one step further. By adding a number between 0 and 1 to the Y coordinate before the division we can make this plane curve in a way that gives us control over how the stars are in the sky.
To do that we will add a bending amount property along with a texture property and declare those variables. While we are at it, we will clean up the
property block a bit. Next, we will have to change our v2f
struct a bit so we can pass the world position from the vertex shader to the fragment shader.
Then in the fragment shader we can get the direction, do the division, and finally sample the texture. For now, we will just use a test texture to see it in action.
You can get that texture here.
Properties
    {
        [Header(SkyAndSun)]
        [KeywordEnum(None, Simple, High Quality)] _SunDisk ("Sun", Int) = 2
        _SunSize ("Sun Size", Range(0,1)) = 0.04
        _SunSizeConvergence("Sun Size Convergence", Range(1,10)) = 5
        _AtmosphereThickness ("Atmosphere Thickness", Range(0,5)) = 1.0
        _SkyTint ("Sky Tint", Color) = (.5, .5, .5, 1)
        _GroundColor ("Ground", Color) = (.369, .349, .341, 1)
        _Exposure("Exposure", Range(0, 8)) = 1.3

        [Header (Stars)]
        _StarTex("Star Tex", 2D) = "black" {}
        _StarBending("Star Bending", Range(0, 1)) = 1
    }

...

    uniform half _Exposure;     // HDR exposure
    uniform half3 _GroundColor;
    uniform half _SunSize;
    uniform half _SunSizeConvergence;
    uniform half3 _SkyTint;
    uniform half _AtmosphereThickness;

    uniform sampler2D _StarTex;
    uniform float4 _StarTex_ST;
    uniform float _StarBending;

    struct appdata
    {
        float4 vertex : POSITION;
        UNITY_VERTEX_INPUT_INSTANCE_ID
    };

    struct v2f
    {
        float4  pos             : SV_POSITION;
            float3 worldPos : TEXCOORD0;
        #if SKYBOX_SUNDISK == SKYBOX_SUNDISK_HQ
        // for HQ sun disk, we need vertex itself to calculate ray-dir per-pixel
            float3  vertex          : TEXCOORD1;
        #elif SKYBOX_SUNDISK == SKYBOX_SUNDISK_SIMPLE
            half3   rayDir          : TEXCOORD1;
        #else
            // as we dont need sun disk we need just rayDir.y (sky/ground threshold)
            half    skyGroundFactor : TEXCOORD1;
        #endif

        // calculate sky colors in vprog
        half3   groundColor     : TEXCOORD2;
        half3   skyColor        : TEXCOORD3;

        #if SKYBOX_SUNDISK != SKYBOX_SUNDISK_NONE
            half3   sunColor        : TEXCOORD4;
        #endif

        UNITY_VERTEX_OUTPUT_STEREO
    };

    v2f vert (appdata v)
    {
        v2f OUT;
        UNITY_SETUP_INSTANCE_ID(v);
        UNITY_INITIALIZE_VERTEX_OUTPUT_STEREO(OUT);
        OUT.pos = UnityObjectToClipPos(v.vertex);
        OUT.worldPos = mul(unity_ObjectToWorld, v.vertex);

        float3 kSkyTintInGammaSpace = COLOR_2_GAMMA(_SkyTint); // convert tint from Linear back to Gamma
        float3 kScatteringWavelength = lerp (

...

    fixed4 frag (v2f IN) : SV_Target
    {
        //first off we declare some values and set up some stuff that will get used a lot in the shader
        float4 col = float4(0, 0, 0, 0);

        //first off we have to make our positions fit a sphere
        float3 normWorldPos = normalize(IN.worldPos);

    //Start of Unity code
        // if y > 1 [eyeRay.y < -SKY_GROUND_THRESHOLD] - ground
        // if y >= 0 and < 1 [eyeRay.y <= 0 and > -SKY_GROUND_THRESHOLD] - horizon
        // if y < 0 [eyeRay.y > 0] - sky
        #if SKYBOX_SUNDISK == SKYBOX_SUNDISK_HQ
            half3 ray = normalize(IN.vertex.xyz);
            half y = ray.y / SKY_GROUND_THRESHOLD;
        #elif SKYBOX_SUNDISK == SKYBOX_SUNDISK_SIMPLE
            half3 ray = IN.rayDir.xyz;
            half y = ray.y / SKY_GROUND_THRESHOLD;
        #else
            half y = IN.skyGroundFactor;
        #endif

            // if we did precalculate color in vprog: just do lerp between them
                col.rgb = lerp(IN.skyColor, IN.groundColor, saturate(y));

        #if SKYBOX_SUNDISK != SKYBOX_SUNDISK_NONE
            if(y < 0.0)
            {
                col.rgb += IN.sunColor * calcSunAttenuation(_WorldSpaceLightPos0.xyz, -ray, _SunSize, _SunSizeConvergence);
            }
        #endif

        #if defined(UNITY_COLORSPACE_GAMMA) && !SKYBOX_COLOR_IN_TARGET_COLOR_SPACE
            col.rgb = LINEAR_2_OUTPUT(col);
        #endif

    //End of Unity Code

    //Stars
        float2 starsUV = normWorldPos.xz / (normWorldPos.y + _StarBending);
        col.rgb = tex2D(_StarTex, starsUV * _StarTex_ST.xy + _StarTex_ST.zw).rgb;

        return col;
    }
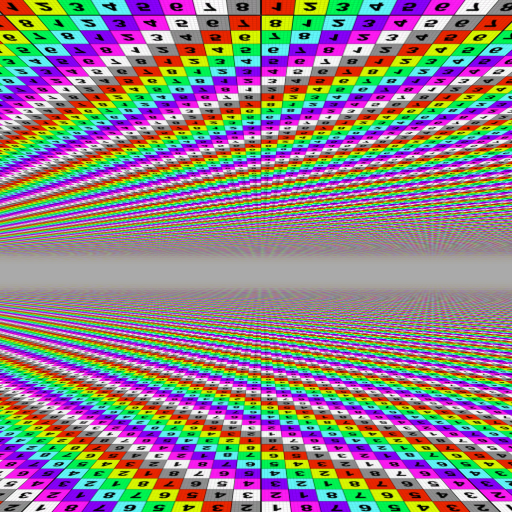
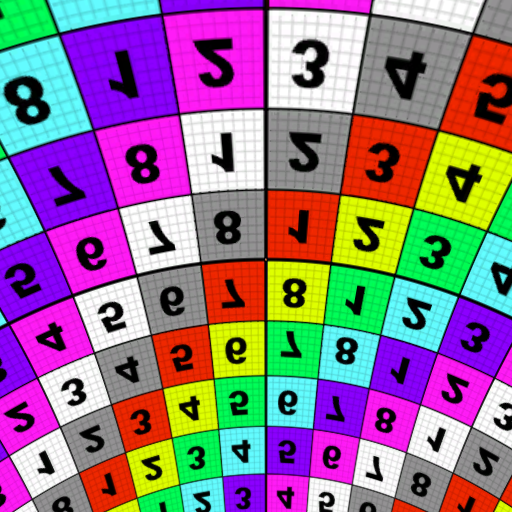
On the left _StarsBending is set to 0 and on the right _StarsBending is set to 1
Now to get the actual stars we will switch to using our Voronoi texture and take the value at our texture sample, invert it with a 1 - value
and then raise it to a power to get tight little dots in the sky. While we are at it let also add some new properties to control where the horizon
starts to mask out all of the features we are going to add because we do not want to be able to see them under the horizon anyway. To do that we take the
dot product of our world direction and an up vector, remap that value so that at our user set values it goes from 0 to 1 and then invert the value so 1 is
on top and zero is at the bottom. We can then use the 0 to 1 value to lerp between the background color and our added features. Once done play with the values
a bit to get what you like.
Properties
{
    [Header(SkyAndSun)]
    [KeywordEnum(None, Simple, High Quality)] _SunDisk ("Sun", Int) = 2
    _SunSize ("Sun Size", Range(0,1)) = 0.04
    _SunSizeConvergence("Sun Size Convergence", Range(1,10)) = 5
    _AtmosphereThickness ("Atmosphere Thickness", Range(0,5)) = 1.0
    _SkyTint ("Sky Tint", Color) = (.5, .5, .5, 1)
    _GroundColor ("Ground", Color) = (.369, .349, .341, 1)
    _Exposure("Exposure", Range(0, 8)) = 1.3
    _SkyFadeStart("Sky Fade Start", Range(-1, 1)) = .05
    _SkyFadeEnd("Sky End Start", Range(-1, 1)) = -.05

    [Header (Stars)]
    _StarTex("Star Tex", 2D) = "black" {}
    _StarBending("Star Bending", Range(0, 1)) = 1
    _StarBrightness("Star Brightness", Range(0, 100)) = 8.5
}

...

    uniform half _Exposure;     // HDR exposure
    uniform half3 _GroundColor;
    uniform half _SunSize;
    uniform half _SunSizeConvergence;
    uniform half3 _SkyTint;
    uniform half _AtmosphereThickness;
    uniform half _SkyFadeStart, _SkyFadeEnd;

    uniform sampler2D _StarTex;
    uniform float4 _StarTex_ST;
    uniform float _StarBending, _StarBrightness;

...

    float Remap(float In, float2 InMinMax, float2 OutMinMax)
    {
        return OutMinMax.x + (In - InMinMax.x) * (OutMinMax.y - OutMinMax.x) / (InMinMax.y - InMinMax.x);
    }

    fixed4 frag (v2f IN) : SV_Target
    {
        //first off we declare some values and set up some stuff that will get used a lot in the shader
        float4 col = float4(0, 0, 0, 0);

        //first off we have to make our positions fit a sphere
        float3 normWorldPos = normalize(IN.worldPos);

        //this sets up where things will start to fade out along the horizon. The values allow us to give it some range so it fades out
        //we have to do 1 minus because the start fade value is actauly higher then the end. You could do the dot with down but I like this better
        float horizonValue = dot(normWorldPos, float3(0, 1, 0));
        horizonValue = 1 - saturate(Remap(horizonValue, float2(_SkyFadeStart, _SkyFadeEnd), float2(0, 1)));

...

    //Stars
        float2 starsUV = normWorldPos.xz / (normWorldPos.y + _StarBending);
        float stars = tex2D(_StarTex, starsUV * _StarTex_ST.xy + _StarTex_ST.zw).r;
        //invert the voronoi
        stars = 1 - stars;
        //and then raise the value to a power to adjust the brightness falloff of the stars
        stars = pow(stars, _StarBrightness);

        //then lerp to the stars color masking out the horizon
        col.rgb = lerp(col.rgb, col.rgb + stars, horizonValue);

        return col;
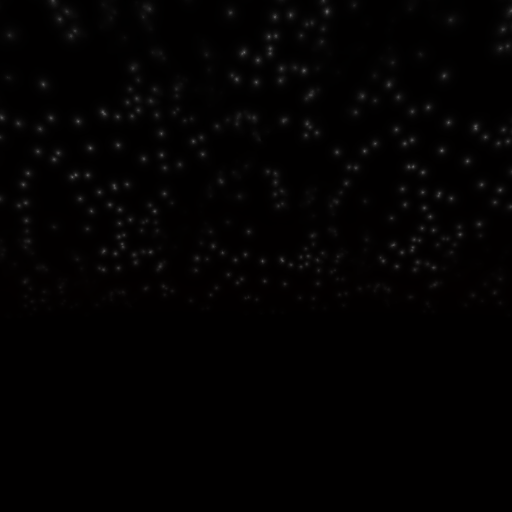
Stars!!!
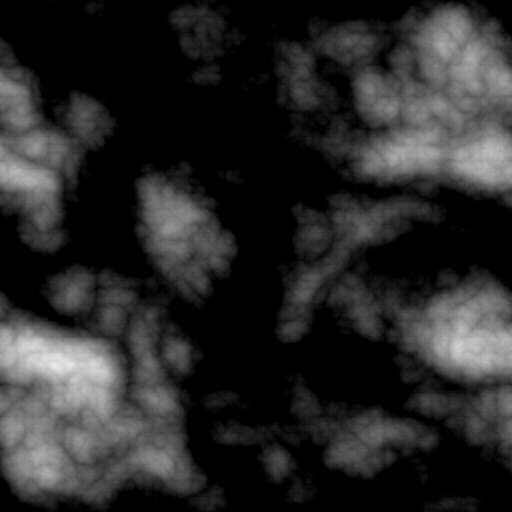
Now to give our stars a little more life, we will make them twinkle. To do this we will sample a noise texture using the same uvs we used to sample the
voronoi texture. Then, multiply it by a user controlled value, and finally subtract that from our stars value. We will also saturate
the stars value before doing the lerp to clamp everything between 0 and 1. You can get the texture I used
here.
Add the following code to your shader.
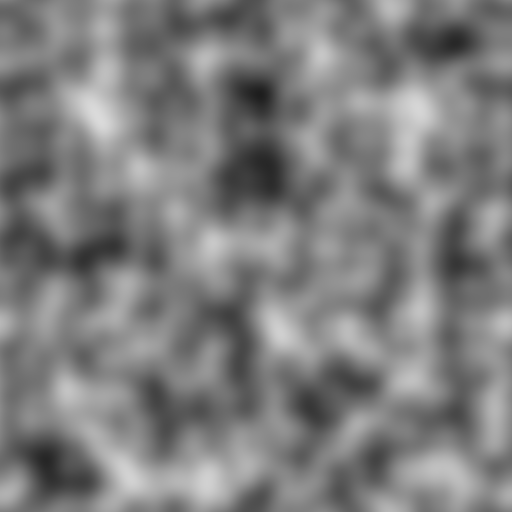
Noise texture used to create a twinkle effect on the stars
    _SkyFadeStart("Sky Fade Start", Range(-1, 1)) = .05
    _SkyFadeEnd("Sky End Start", Range(-1, 1)) = -.05

    [Header (Stars)]
    _StarTex("Star Tex", 2D) = "black" {}
    _StarBending("Star Bending", Range(0, 1)) = 1
    _StarBrightness("Star Brightness", Range(0, 100)) = 8.5
    _TwinkleTex ("Twinkle Noise Tex", 2D) = "black" {}
    _TwinkleBoost("Twinkle Boost", Range(0, 1)) = .25
    _TwinkleSpeed("Twinkle Speed", Range(0, 1)) = .1

...

    uniform half _SkyFadeStart, _SkyFadeEnd;

    uniform sampler2D _StarTex, _TwinkleTex;
    uniform float4 _StarTex_ST, _TwinkleTex_ST;
    uniform float _StarBending, _StarBrightness;
    uniform float _TwinkleBoost, _TwinkleSpeed;

...

    float2 starsUV = normWorldPos.xz / (normWorldPos.y + _StarBending);
    float stars = tex2D(_StarTex, starsUV * _StarTex_ST.xy + _StarTex_ST.zw).r;
    //invert the voronoi
    stars = 1 - stars;
    //and then raise the value to a power to adjust the brightness falloff of the stars
    stars = pow(stars, _StarBrightness);

    //we also sample a basic noise texture, this allows us to modulate the star brightness, this creates a twinkle effect
    float twinkle = tex2D(_TwinkleTex, (starsUV * _TwinkleTex_ST.xy) + _TwinkleTex_ST.zw + float2(1, 0) * _Time.y * _TwinkleSpeed).r;
    //modulate the twinkle value
    twinkle *= _TwinkleBoost;

    //then adjust the final color
    stars -= twinkle;
    stars = saturate(stars);

    //then lerp to the stars color masking out the horizon
    col.rgb = lerp(col.rgb, col.rgb + stars, horizonValue);
Twinkle twinkle procedural star
Once last addition we will make is a way to transition our added features from day to night, as somethings like stars should really only by visible
during the night. To do that we will again add a few more properties, declare their variables, and then do almost exactly what we did for our horizon value
except we will use the position of the sun instead of our world direction. Since we will use the sun position in a few places we will store it in a nicely named
variable and use that instead of Unity’s _WorldSpaceLightPos0.xyz
as that is kind of annoying to write out all the time. Then we can use our calculated
night value to affect how we lerp to the final color.
    [Header(SkyAndSun)]
    [KeywordEnum(None, Simple, High Quality)] _SunDisk ("Sun", Int) = 2
    _SunSize ("Sun Size", Range(0,1)) = 0.04
    _SunSizeConvergence("Sun Size Convergence", Range(1,10)) = 5
    _AtmosphereThickness ("Atmosphere Thickness", Range(0,5)) = 1.0
    _SkyTint ("Sky Tint", Color) = (.5, .5, .5, 1)
    _GroundColor ("Ground", Color) = (.369, .349, .341, 1)
    _Exposure("Exposure", Range(0, 8)) = 1.3
    _NightStartHeight("Night Start Height", Range(-1, 1)) = -.1
    _NightEndHeight("Night End Height", Range(-1, 1)) = -.2
    _SkyFadeStart("Sky Fade Start", Range(-1, 1)) = .05
    _SkyFadeEnd("Sky End Start", Range(-1, 1)) = -.05

...

    uniform half _Exposure;     // HDR exposure
    uniform half3 _GroundColor;
    uniform half _SunSize;
    uniform half _SunSizeConvergence;
    uniform half3 _SkyTint;
    uniform half _AtmosphereThickness;
    uniform half _NightStartHeight, _NightEndHeight;
    uniform half _SkyFadeStart, _SkyFadeEnd;

...

    //this sets up where things will start to fade out along the horizon. The values allow us to give it some range so it fades out
    //we have to do 1 minus because the start fade value is actauly higher then the end. You could do the dot with down but I like this better
    float horizonValue = dot(normWorldPos, float3(0, 1, 0));
    horizonValue = 1 - saturate(Remap(horizonValue, float2(_SkyFadeStart, _SkyFadeEnd), float2(0, 1)));

    //grab the sun position
    float3 sunPos = _WorldSpaceLightPos0.xyz;

    //and then do a similar method as the horizon to figure out when things should transistion to the night colors
    float sunDotUp = dot(sunPos, float3(0, 1, 0));
    float night = saturate(Remap(sunDotUp, float2(_NightStartHeight, _NightEndHeight), float2(0, 1)));

...

    #if SKYBOX_SUNDISK != SKYBOX_SUNDISK_NONE
        if(y < 0.0)
        {
            col.rgb += IN.sunColor * calcSunAttenuation(sunPos, -ray, _SunSize, _SunSizeConvergence);
        }
    #endif

...

    float2 starsUV = normWorldPos.xz / (normWorldPos.y + _StarBending);
    float stars = tex2D(_StarTex, starsUV * _StarTex_ST.xy + _StarTex_ST.zw).r;
    //invert the voronoi
    stars = 1 - stars;
    //and then raise the value to a power to adjust the brightness falloff of the stars
    stars = pow(stars, _StarBrightness);

    //then lerp to the stars color masking out the horizon
    col.rgb = lerp(col.rgb, col.rgb + stars, night * horizonValue);

    return col;
On the left we have stars at night and on the right we have no stars during the day
And with that our stars are done for the most part. All we will have to do in future steps is to make sure we mask them out accordingly with the other features we will add. If you want you can grab the finished files for this step here. Next we will work on the procedural moon.
Part 4: Adding a Moon
To create a moon for our skybox there are a few different ways we could go, and it depends on what we specifically want. For this skybox I mainly wanted a moon that could be textured. That was really the inspiration behind making this shader. But it should also be able to orbit around the sky in any orientation, that could change size to simulate eccentric orbits, spin, customizable moon phases, and have the option for being tidal locked, or always facing in the same direction. I tried a few different methods to get this to work but the best way to achieve this is to create a fake sphere in the skybox that we can create normals for. By manipulating those normals we can get a lot of cool stuff to happen.
Since this is going to require a lot of functions, we are going to create another include file to hold all of these functions. So once again, create a new
text file outside of Unity in our Includes
folder, and change the file extension to .cginc
. Then we will add our include guard to the top
of our include file. I named my include file MoonFunctions.cginc
but feel free to name yours whatever you like, just make the appropriate changes
in your code.
#ifndef MOON_INCLUDE
    #define MOON_INCLUDE

#endif
This is the start of our MoonFunctions.cginc
include file.
The first thing we will add to this is method for creating the actual moon. To do this we will use some math called ray-surface intersection. There is a lot of info on the internet about this and you can find a lot more of these functions, and the one we will be using, here. We will be using the sphere function, as we are making a moon, but I suppose you could create some cool skies with some of the other functions. So add the SphereIntersect function to our include file in between the preprocessor directives just like we did with the last include file.
#ifndef MOON_INCLUDE
    #define MOON_INCLUDE

    //sphere tracing from https://www.iquilezles.org/www/articles/intersectors/intersectors.htm
    float SphereIntersect(float3 rayOrigin, float3 rayDirection, float3 spherePos, float sphereRadius)
    {
        float3 originToCenter = rayOrigin - spherePos;
        float b = dot(originToCenter, rayDirection);
        float c = dot(originToCenter, originToCenter) - sphereRadius * sphereRadius;
        float h = b * b - c;
        if (h < 0.0)
        {
            return -1.0;
        }
        h = sqrt(h);
        return -b - h;
    }

#endif
This function will return the distance to the sphere from wherever the origin of the ray is, or if the ray does not intersect with the sphere, it will return -1.0. In our shader we will use this value to either draw the moon or not draw the moon. If we are working on a pixel that should have the moon draw, we can use the returned value to figure out exactly in would space the surface of the moon is. We can then use that to calculate a normal direction for the sphere by subtracting the moon’s origin from the surface position we calculated. Then we can use some trigonometry to turn those normals into UV coordinates and sample a texture.
To do all of this we need to know where the moon is, where the viewer is, which direction our ray will be in for the intersection method,
the size of the moon’s radius, and a texture to sample from. Well, in our skybox, we are always at position float3(0, 0, 0)
and the direction of our
ray is just the normWorldPos
we calculated earlier. For now we will just set the moon to be at float3(1, 0, 0)
. We will manipulate this position
later to create an orbit effect. For the radius we will declare a property so that we can control how big the moon looks and for the texture we will also
declare a property so you can set whatever texture you like. For now, let’s just use that
test texture
again.
To calculate our normals we will use that trigonometry I talked about. We can take the tangent of the normal’s X and Z values using the atan2
function. This will return a value between -π and π. And then to normalize these values we can divide by 2π to get a value between -0.5 and 0.5.
This will be the X value of our UV coordinates. This range is better than using 0 to 1 because it covers the same range of the texture, but we can use derivatives
to avoid problems with mip maps. Normally if the UV went from 0 to 1 over the course of 1 pixel the GPU would use the highest mip level possible which would
cause an ugly seam in our moon. But we can take the frac
of our -0.5 to 0.5 value, which will return whatever remainder is after the decimal point of
what we pass into the function. And this will be equal to our original value but without the derivative problem.
Then we can take a similar approach for Y coordinate of our UV pair, except this time we will use acos method. It also returns between -π and π.
At the top of the sphere it will return 0.0 and at the bottom of the sphere it will return π. So, we will use the negative Y value of our spheres normal and then
divide by π to get a value between 0.0 and 1.0. We don’t have to worry about the derivatives here because as we go over the top of the sphere the uv.y value
will just start to go back towards zero, not jump immediately back to zero. Then we can use this uv coordinate to sample our texture. Add the following code to your
shader.
    [Header (Stars)]
    _StarTex("Star Tex", 2D) = "black" {}
    _StarBending("Star Bending", Range(0, 1)) = 1
    _StarBrightness("Star Brightness", Range(0, 100)) = 8.5

    [Header(Moon)]
    _MoonTex("Moon Tex", 2D) = "white" {}
    _MoonRadius ("Moon Radius", Range(0, 1)) = .2

...

    #include "UnityCG.cginc"
    #include "Lighting.cginc"
    #include "Includes/MoonFunctions.cginc"
    #include "Includes/Scattering.cginc"

...

    uniform sampler2D _StarTex;
    uniform float4 _StarTex_ST;
    uniform float _StarBending, _StarBrightness;

    uniform sampler2D _MoonTex;
    float4 _MoonTex_ST;
    float _MoonRadius;

    struct appdata

...

    //End of Unity Code

    //Moon
        float3 currentMoonPos = float3(1, 0, 0);
        float radius = _MoonRadius;
        float sphere = SphereIntersect(float3(0, 0, 0), normWorldPos, currentMoonPos, radius);

        //get the position on the sphere and use that to get the normal for the sphere
        float3 moonFragPos = normWorldPos * sphere + float3(0, 0, 0);
        //the normal is how we eventually get uvs and lighting
        float3 moonFragNormal = normalize(moonFragPos - currentMoonPos);

        //get uv from the normal
        float u = atan2(moonFragNormal.z, moonFragNormal.x) / UNITY_TWO_PI;
        //to get around this we take the frac of this u value because these values are the same at the boundary but the frac value doesnt have the seam
        float fracU = frac(u);

        //so then we just pick which of the u values we want, the -0.001 just makes it favor the original one
        //to get the y we use acos which returns the same as atan. using acos is better than asin because asin causes warping at the poles
        float2 moonUV = float2(
                        fwidth(u) < fwidth(fracU) - 0.001 ? u : fracU,
                        acos(-moonFragNormal.y) / UNITY_PI
        );

        //if our sphere tracing returned a positive value we have a moon fragment
        if(sphere >= 0.0){
            //so we grab the moon tex and multiple the color
            float3 moonTex = tex2D(_MoonTex, moonUV).rgb;

            //then lerp to the final color masking out anything under the horizon
            col.rgb = lerp(col.rgb, moonTex, horizonValue);
        }

    //Stars
A rather ominously textured sphere
Nice! Our moon is correctly textured. One last thing we should do before we move on to adding all the fun features for our moon is to mask out the stars where the moon is. The moon should be much closer to us than the stars so any where there is moon, we should not see stars. To do this we can use the value of the sphere intersection down where we calculate the final star color. While we’re at it lets add a real moon texture from NASA that you can get here.
    stars = pow(stars, _StarBrightness);

    //then lerp to the stars color masking out the horizon
    col.rgb = lerp(col.rgb, col.rgb + stars, night * horizonValue * (1 - step(0, sphere)));

    return col;
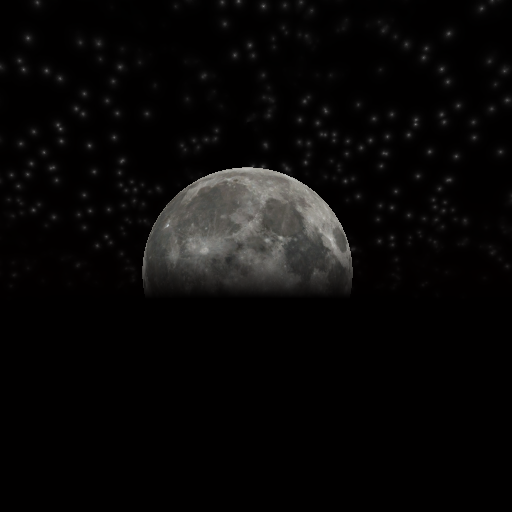
Now we have a textured moon that masks out the stars behind it
Now that we have our moon the next thing, we will do is get it to orbit around the sky. The way I did this was to use the parametric equation of an ellipse.
An ellipse has a semi major and minor axis, major being the largest radius on the ellipse and the minor being the smallest radius on the ellipse. The center
of the ellipse is always the origin or float3(0, 0, 0) just to keep things simple.
How we get a position from this is to take the cosine of the angle around the ellipse and multiply it by the semi major axis to get the X
coordinate, and take the sine of the same angle multiplied by the semi minor
axis to get the Z coordinate. We will only work in 2D for this part so the Y will get set to 0. Then we can normalize this vector to get a direction for
where our moon is. To get three dimensional orbits we then rotate our position on the ellipse using a rotation matrix that we pass float3 with angles to rotate
around the three world axis.
To do this we will add three functions, properties for the semi major and minor axis and a property for how fast the moon rotates. One of the functions will
just apply our rotation matrix, one of the functions will apply the ellipse equation to get our 2D position, and the last function will just call the first
two so that we do not have to write out three method calls in our shader. Add the following to your MoonFunctions.cginc file just after the include
guard.
#ifndef MOON_INCLUDE
    #define MOON_INCLUDE

    //a rotation matrix to rotate and thing in world space
    float3 RotateWorldPosition(float3 position, float3 axis)
    {
        float3 rot = axis;
        float3x3 rotMat = float3x3(cos(rot.y) * cos(rot.z), -cos(rot.y) * sin(rot.z),
            sin(rot.y), (cos(rot.x) * sin(rot.z)) + (sin(rot.x) * sin(rot.y) * cos(rot.z)),
            (cos(rot.x) * cos(rot.z)) - (sin(rot.x) * sin(rot.y) * sin(rot.z)),
            -sin(rot.x) * cos(rot.y), (sin(rot.x) * sin(rot.z)) - (cos(rot.x) * sin(rot.y) * cos(rot.z)),
            (sin(rot.x) * cos(rot.z)) + (cos(rot.x) * sin(rot.y) * sin(rot.z)), cos(rot.x) * cos(rot.y));
        float3 rotPos = mul(rotMat, position);
        return rotPos;
    }

    //this is using the equation of an ellipse. The angle is time * speed, or what ever angle you want to sample at
    float3 ElipsePosition(float2 MajMinAxis, float angle)
    {
        float3 orbitPos;
        orbitPos.x = (MajMinAxis.x * cos(angle));
        orbitPos.y = 0;
        orbitPos.z = (MajMinAxis.y * sin(angle));
        return normalize(orbitPos);
    }

    //this just calls the above function and rotates it by the desired amount
    float3 GetOrbitPosition(float3 orbitOffsetAngles, float2 MajMinAxis, float angle)
    {
        float3 p = ElipsePosition(MajMinAxis, angle);
        p = RotateWorldPosition(p, float3(radians(orbitOffsetAngles.x), radians(orbitOffsetAngles.y), radians(orbitOffsetAngles.z)));
        return p;
    }
Then also add the properties to our shader, declare them and call the functions in the frag function. For the angle we will just multiply _Time.y
by our orbit speed property. Make the following additions to the shader.
[Header(Moon)]
    _MoonTex("Moon Tex", 2D) = "white" {}
    _MoonRadius ("Moon Radius", Range(0, 1)) = .2
    _MoonOrbitAngle("Moon Orbit Start Angle (XYZ)", vector) = (0, 0, 45, 0)
    _MoonOrbitSpeed("Moon Orbit Speed", Range(-1, 1)) = .05
    _MoonSemiMajAxis("Moon Semi Major Axis", float) = 1
    _MoonSemiMinAxis("Moon Semi Minor Axis", float) = 1

...

    uniform sampler2D _MoonTex;
    uniform float4 _MoonTex_ST;
    uniform float4 _MoonOrbitAngle;
    uniform float _MoonRadius;
    uniform float _MoonOrbitSpeed, _MoonSemiMajAxis, _MoonSemiMinAxis;

...

    //Moon
        float3 currentMoonPos = float3(1, 0, 0);

        float orbitAngle = _Time.y * _MoonOrbitSpeed;

        //we also need to grab the half radius of the ellipse at the major and minor Axis
        //these are used in the ellipse equation.
        float2 MajMinAxis = float2(_MoonSemiMajAxis, _MoonSemiMinAxis);

        //this equation takes these values along with the _MoonOrbitAngle to figure out the position in the moons orbit
        float3 currentMoonPos = GetOrbitPosition(_MoonOrbitAngle, MajMinAxis, orbitAngle);

        float radius = _MoonRadius;
        float sphere = SphereIntersect(float3(0, 0, 0), normWorldPos, currentMoonPos, radius);
It’s alive!!!
Play with the axis values as you like, they will change how fast the moon appears to fly by. But to really get the effect of eccentric orbits the moon
needs to change size as it gets further away. To do this we will change our _MoonRadius property to a _MoonMaxSize and
_MoonMinSize. Then we will calculate how close the moon is to the semi minor axis and use that value to lerp between these
two sizes. It isn’t physically accurate but it works well and gives us more control over how the moon will look. First, we will add the
lerp function to our MoonFunctions.cginc file just after the GetOrbitPosition function.
   float3 GetOrbitPosition(float3 orbitOffsetAngles, float2 MajMinAxis, float angle)
    {
        float3 p = ElipsePosition(MajMinAxis, angle);
        p = RotateWorldPosition(p, float3(radians(orbitOffsetAngles.x), radians(orbitOffsetAngles.y), radians(orbitOffsetAngles.z)));
        return p;
    }

    //this lerps between two radius values based on how close the moon is to either the major or minor axis, major in this case is always (1, 0, 0)
    float GetMoonDistance(float Min, float Max, float2 MajMinAxis, float angle)
    {
        float3 pos = ElipsePosition(MajMinAxis, angle);
        float lerpFactor = abs(dot(pos, float3(0, 0, 1)));
        float dist = lerp(Min, Max, smoothstep(0, 1, lerpFactor));
        return dist;
    }
All this function is doing is calling the EllipsePosition function again with the same values as before but this time we do not rotate the position.
That way we can use the dot product of that position and forward, which by default is always the direction of the semi minor axis, and then use that value to
lerp between the min and max sizes. I use a smoothstep function here to just make the change a little bit smoother.
Now we can call this function in our shader to get the radius for our moon at any point during its orbit. We just have to add a few new properties, declare them and then call the new function and assign its return value to our radius variable. Make the following changes.
   [Header(Moon)]
    _MoonTex("Moon Tex", 2D) = "white" {}
    _MoonRadius ("Moon Radius", Range(0, 1)) = .2
    _MoonMaxSize ("Moon Max Size", Range(0, 1)) = .2
    _MoonMinSize ("Moon Min Size", Range(0, 1)) = .2
    _MoonOrbitAngle("Moon Orbit Start Angle (XYZ)", vector) = (0, 0, 45, 0)
    _MoonOrbitSpeed("Moon Orbit Speed", Range(-1, 1)) = .05
    _MoonSemiMajAxis("Moon Semi Major Axis", float) = 1
    _MoonSemiMinAxis("Moon Semi Minor Axis", float) = 1

...

    uniform sampler2D _MoonTex;
    uniform float4 _MoonTex_ST;
    uniform float4 _MoonOrbitAngle;
    uniform float _MoonRadius;
    uniform float _MoonMaxSize, _MoonMinSize;
    uniform float _MoonOrbitSpeed, _MoonSemiMajAxis, _MoonSemiMinAxis;

...

    float3 currentMoonPos = GetOrbitPosition(_MoonOrbitAngle, MajMinAxis, orbitAngle);

    float radius = _MoonRadius;
    float radius = GetMoonDistance(_MoonMinSize, _MoonMaxSize, MajMinAxis, orbitAngle);
    float sphere = SphereIntersect(float3(0, 0, 0), normWorldPos, currentMoonPos, radius);
Bigger than before!
Now the only problem with this method is that currently the moon will always be smallest at its starting position and largest 90 degrees away from that
position. That is kind of annoying. So what we can do is we can rotate our moon around its orbit before calculating the radius, and then not tell the
GetMoonDistance function about that. This will offset where the moon gets bigger and smaller, giving us full control over its orbit.
To get this working takes a little bit of doing. We need to rotate the moon around the axis that is equal to the normal of the plane that the ellipse lies in. To calculate this we can find the position of the moon at a different angle from it’s current position and take the cross product of those two vectors. Then once we have that up vector, we can use another rotation matrix to rotate however much we want to offset the position by. We cannot use the same rotation matrix that we used before, because that rotates in world space, but we can use a matrix that rotates around an arbitrary axis. You can read more about how to calculate this matrix here.
So once again we will add one more function to our MoonFunctions.cginc inlude file. This function will rotate a point around an arbitrary axis
as was just described. Then we will add a property to our shader to allow control over how much the moon is rotated, and declare that property. To get the up we
will just call the GetOrbitPosition method but pass in orbitAngle - 1 instead of just orbitAngle and take the cross product
of those two results. Then we can pass the up vector along with the amount to rotate, and we will have complete control over our moon’s orbit. Make the
following changes.
#ifndef MOON_INCLUDE
    #define MOON_INCLUDE

...

    //sphere tracing from https://www.iquilezles.org/www/articles/intersectors/intersectors.htm
    float SphereIntersect(float3 rayOrigin, float3 rayDirection, float3 spherePos, float sphereRadius)
    {
        float3 originToCenter = rayOrigin - spherePos;
        float b = dot(originToCenter, rayDirection);
        float c = dot(originToCenter, originToCenter) - sphereRadius * sphereRadius;
        float h = b * b - c;
        if (h < 0.0)
        {
            return -1.0;
        }
        h = sqrt(h);
        return -b - h;
    }

    // How to rotate around any axis https://en.wikipedia.org/wiki/Rotation_matrix#Rotation_matrix_from_axis_and_angle
    float3 RotateArbitraryAxis(float3 vec, float angle, float3 axis)
    {
        float rads = radians(angle);
        float3x3 rot = float3x3(float3(cos(rads) + dot(axis.x, axis.x) * (1 - cos(rads)), axis.x * axis.y * (1 - cos(rads)) - axis.z * sin(rads), axis.x * axis.z * (1 - cos(rads)) + axis.y * sin(rads)),
            float3(axis.y * axis.x * (1 - cos(rads)) + axis.z * sin(rads), cos(rads) + dot(axis.y, axis.y) * (1 - cos(rads)), axis.y * axis.z * (1 - cos(rads)) - axis.x * sin(rads)),
            float3(axis.z * axis.x * (1 - cos(rads)) - axis.y * sin(rads), axis.z * axis.y * (1 - cos(rads)) + axis.x * sin(rads), cos(rads) + dot(axis.z, axis.z) * (1 - cos(rads))));

        return mul(rot, vec);
    }

#endif
Adding the arbitrary rotation matrix to our MoonFunctions.cginc file
   [Header(Moon)]
    _MoonTex("Moon Tex", 2D) = "white" {}
    _MoonMaxSize ("Moon Max Size", Range(0, 1)) = .2
    _MoonMinSize ("Moon Min Size", Range(0, 1)) = .2
    _MoonOrbitAngle("Moon Orbit Start Angle (XYZ)", vector) = (0, 0, 45, 0)
    _MoonOrbitOffset("Moon Orbit Offset", Range(0, 90)) = 0
    _MoonOrbitSpeed("Moon Orbit Speed", Range(-1, 1)) = .05
    _MoonSemiMajAxis("Moon Semi Major Axis", float) = 1
    _MoonSemiMinAxis("Moon Semi Minor Axis", float) = 1

...

    uniform sampler2D _MoonTex;
    uniform float4 _MoonTex_ST;
    uniform float4 _MoonOrbitAngle;
    uniform float _MoonMaxSize, _MoonMinSize;
    uniform float _MoonOrbitSpeed, _MoonOrbitOffset, _MoonSemiMajAxis, _MoonSemiMinAxis;

...

    //this equation takes these values along with the _MoonOrbitAngle to figure out the position in the moons orbit
    float3 currentMoonPos = GetOrbitPosition(_MoonOrbitAngle, MajMinAxis, orbitAngle);

    //we need to know which direction is up from the orbit plane, We do this by getting a different position and crossing the two positions
    float3 prevMoonPos = GetOrbitPosition(_MoonOrbitAngle, MajMinAxis, orbitAngle - 1);
    float3 moonUp = normalize(cross(currentMoonPos, prevMoonPos));

    //Then we can offset the position around the orbit. This allows us to change where in the orbit the planet should be largest or smallest
    currentMoonPos = RotateArbitraryAxis(currentMoonPos, _MoonOrbitOffset, moonUp);

    //float radius = _MoonRadius;
    float radius = GetMoonDistance(_MoonMinSize, _MoonMaxSize, MajMinAxis, orbitAngle);
    float sphere = SphereIntersect(float3(0, 0, 0), normWorldPos, currentMoonPos, radius);
Changes made to the shader
Now our moon can get closer while high in the sky. I have set the semi major axis to 4, the minor to 1,
_MoonOrbitAngle to float3(0, 0, 45) and the _MoonOrbitOffset to 90.
Great, that gives us complete control over our moon’s orbit. Now the last features we will add to our moon is phases and spinning. For phases we will have two modes: user-controller or light-controlled. For our spin we will have three modes: tidal-locked, local-rotation, and the default, which is world rotation. We will start with the spin as that is a little more complicated.
To spin our moon, we will declare a vector property that will be the angle per second we want our moon to rotate. We will pass that into our RotateWorldPosition
function defined in our MoonFunctions.cginc along with the normal, after converting the angle to radians, as that is what the function expects.
This will rotate the normal around the moon origin, and since we use the normal to calculate uvs, that will spin the moon. That is pretty much all we need to
do to rotate the moon. However, for our different modes we will define the local, or object space, coordinates of our moon and create a matrix that converts from world space
to local space using that local definition. The axis of our local space will be z = towards the camera, x = opposite the direction of orbit, and y = the moonUp
variable that we already calculated.
Then with this matrix we can convert the normal to local space and rotate the normal if we are spinning locally, or just use the local normal if in tidal-lock mode. This works because in local space the normals that are visible to the player are always the same. However, to make any part of the moon texture visible, we will rotate the local normal by the same amount so that the user can control which part of the moon faces the player. To do this we will declare a few properties that control the spin of the moon and what mode the shader is in. We will use the enum property attribute to control keywords that are defined for our shader. You can read more about that here. Add the following code to your shader.
    [Header(Moon)]
    _MoonTex("Moon Tex", 2D) = "white" {}
    _MoonMaxSize ("Moon Max Size", Range(0, 1)) = .2
    _MoonMinSize ("Moon Min Size", Range(0, 1)) = .2
    _MoonOrbitAngle("Moon Orbit Start Angle (XYZ)", vector) = (0, 0, 45, 0)
    _MoonOrbitOffset("Moon Orbit Offset", Range(0, 90)) = 0
    _MoonOrbitSpeed("Moon Orbit Speed", Range(-1, 1)) = .05
    _MoonSemiMajAxis("Moon Semi Major Axis", float) = 1
    _MoonSemiMinAxis("Moon Semi Minor Axis", float) = 1
    [KeywordEnum(TIDAL_LOCK, LOCAL_ROTATE, WORLD_ROTATE)] _MoonSpinOption ("Moon Spin Option", float) = 1
    _MoonTidalAngle("Moon Tidal Lock Angle (XYZ)", vector) = (0, 0, 0, 0)
    _MoonSpinSpeed("Moon Spin Speed (XYZ)", vector) = (0, 0, 0, 0)

...

    uniform sampler2D _MoonTex;
    uniform float4 _MoonTex_ST;
    uniform float4 _MoonOrbitAngle;
    uniform float _MoonMaxSize, _MoonMinSize;
    uniform float _MoonOrbitSpeed, _MoonOrbitOffset, _MoonSemiMajAxis, _MoonSemiMinAxis;
    uniform float3 _MoonSpinSpeed, _MoonTidalAngle;

...

    //get the position on the sphere and use that to get the normal for the sphere
    float3 moonFragPos = normWorldPos * sphere + float3(0, 0, 0);
    //the normal is how we eventually get uvs and lighting
    float3 moonFragNormal = normalize(moonFragPos - currentMoonPos);

    //get the local forward and tangent vector for the sphere based on the up
    float3 moonForward = normalize(-currentMoonPos);
    float3 moonTangent = cross(moonForward, moonUp);

    //construct a world to object matrix
    float3x3 worldToObject = float3x3(moonTangent, moonUp, moonForward);

//if we want tidal locking, i.e. the same face always looks at the viewer
#ifdef _MOONSPINOPTION_TIDAL_LOCK
                moonFragNormal = mul(worldToObject, moonFragNormal);
                //rotate the normal to change which side of the moon points towards the viewer
                moonFragNormal = RotateWorldPosition(moonFragNormal, float3(radians(_MoonTidalAngle.x), radians(_MoonTidalAngle.y), radians(_MoonTidalAngle.z)));
//if not tidal locked then we can have the planet spin
#else
    //we can do this in local coords
    #ifdef _MOONSPINOPTION_LOCAL_ROTATE
                moonFragNormal = mul(worldToObject, moonFragNormal);
                float3 spinAngle = _Time.y * _MoonSpinSpeed.xyz;
                moonFragNormal = RotateWorldPosition(moonFragNormal, float3(radians(spinAngle.x), radians(spinAngle.y), radians(spinAngle.z)));
                moonFragNormal = mul(moonFragNormal, worldToObject);
    //or in world coords
    #else
                float3 spinAngle = _Time.y * _MoonSpinSpeed.xyz;
                moonFragNormal = RotateWorldPosition(moonFragNormal, float3(radians(spinAngle.x), radians(spinAngle.y), radians(spinAngle.z)));
    #endif
#endif

    //get uv from the normal
    float u = atan2(moonFragNormal.z, moonFragNormal.x) / UNITY_TWO_PI;
    //to get around this we take the frac of this u value because these values are the same at the boundary but the frac value doesnt have the seam
    float fracU = frac(u);

    //so then we just pick which of the u values we want, the -0.001 just makes it favor the original one
    //to get the y we use acos which returns the same as atan. using acos is better than asin because asin causes warping at the poles
    float2 moonUV = float2(
                    fwidth(u) < fwidth(fracU) - 0.001 ? u : fracU,
                    acos(-moonFragNormal.y) / UNITY_PI
    );
Our moon spinning in world space

Our moon tidal locked always showing the same face
Lastly, we will add phases to our moon to finish off this part of the shader. To have the phases be based off of the sun direction all we have to do is take the
dot product of the moon normal and the light direction, to simulate basic Lambert lighting. To have user control over the moon phase is a little bit more
complicated. To do this we will convert our normal to local space, and take the dot product with float3(0, 0, 1), or forward, which is always
towards the player in local space. We can then rotate this forward with a vector property that we declare to change its direction. Then finally we can take the
dot product of this vector and the normal in local space to simulate Lambert lighting. Then with this dot product we will lerp between the
moon and the sky color. We will make a few changes to what we just did because we do not need to
convert to local space multiple times. We will also add a property to control the color of the moon while we are finishing up. Add the following.
        [Header(Moon)]
        _MoonColor("Moon Color", Color) = (1, 1, 1, 1)
        _MoonTex("Moon Tex", 2D) = "white" {}
        _MoonMaxSize ("Moon Max Size", Range(0, 1)) = .2
        _MoonMinSize ("Moon Min Size", Range(0, 1)) = .2
        _MoonOrbitAngle("Moon Orbit Start Angle (XYZ)", vector) = (0, 0, 45, 0)
        _MoonOrbitOffset("Moon Orbit Offset", Range(0, 90)) = 0
        _MoonOrbitSpeed("Moon Orbit Speed", Range(-1, 1)) = .05
        _MoonSemiMajAxis("Moon Semi Major Axis", float) = 1
        _MoonSemiMinAxis("Moon Semi Minor Axis", float) = 1
        [Toggle(PHASE_LIGHT)] _MoonPhaseOption ("Auto Phase", float) = 1
        _MoonPhase("Moon Phase", vector) = (50, 0, 0, 0)
        [KeywordEnum(TIDAL_LOCK, LOCAL_ROTATE, WORLD_ROTATE)] _MoonSpinOption ("Moon Spin Option", float) = 1
        _MoonTidalAngle("Moon Tidal Lock Angle (XYZ)", vector) = (0, 0, 0, 0)
        _MoonSpinSpeed("Moon Spin Speed (XYZ)", vector) = (0, 0, 0, 0)

...

    #pragma multi_compile _MOONSPINOPTION_TIDAL_LOCK _MOONSPINOPTION_LOCAL_ROTATE _MOONSPINOPTION_WORLD_ROTATE
    multi_compile _ PHASE_LIGHT
    #pragma multi_compile_local _SUNDISK_NONE _SUNDISK_SIMPLE _SUNDISK_HIGH_QUALITY

...

    uniform sampler2D _MoonTex;
    uniform float4 _MoonTex_ST;
    uniform float4 _MoonColor;
    uniform float4 _MoonOrbitAngle;
    uniform float _MoonMaxSize, _MoonMinSize;
    uniform float _MoonOrbitSpeed, _MoonOrbitOffset, _MoonSemiMajAxis, _MoonSemiMinAxis;
    uniform float3 _MoonSpinSpeed, _MoonTidalAngle;
    uniform float3 _MoonPhase;

    //construct a world to object matrix
    float3x3 worldToObject = float3x3(moonTangent, moonUp, moonForward);

    //transform the normal into local space and use that to calculate lighting
    //it looks wrong to have the lighting change as it goes across the sky, that why we keep it static
    float3 phaseNormal = mul(worldToObject, moonFragNormal);

#ifndef PHASE_LIGHT
    //rotate the normal by the desired amount to change the phase of the moon
    float3 moonPhase = RotateWorldPosition(float3(0, 0, 1), float3(radians(_MoonPhase.x), radians(_MoonPhase.y), radians(_MoonPhase.z)));

    //basic lambert lighting
    float NDotL = dot(moonPhase, phaseNormal);

#else
    //basic lambert lighting
    float NDotL = dot(sunPos, moonFragNormal);

#endif

//if we want tidal locking, i.e. the same face always looks at the viewer
#ifdef _MOONSPINOPTION_TIDAL_LOCK
    //we use the local definiton of the normal
    moonFragNormal = mul(worldToObject, moonFragNormal);
    moonFragNormal = phaseNormal;
    //and rotate the normal to change which side of the moon points towards the viewer
    moonFragNormal = RotateWorldPosition(moonFragNormal, float3(radians(_MoonTidalAngle.x), radians(_MoonTidalAngle.y), radians(_MoonTidalAngle.z)));
//if not tidal locked then we can have the planet spin
#else
    //we can do this in local coords
    #ifdef _MOONSPINOPTION_LOCAL_ROTATE
        //we use the local definiton of the normal
        moonFragNormal = mul(worldToObject, moonFragNormal);
        moonFragNormal = phaseNormal;
        float3 spinAngle = _Time.y * _MoonSpinSpeed.xyz;
        moonFragNormal = RotateWorldPosition(moonFragNormal, float3(radians(spinAngle.x), radians(spinAngle.y), radians(spinAngle.z)));
        moonFragNormal = mul(moonFragNormal, worldToObject);
    //or in world coords
    #else
        float3 spinAngle = _Time.y * _MoonSpinSpeed.xyz;
        moonFragNormal = RotateWorldPosition(moonFragNormal, float3(radians(spinAngle.x), radians(spinAngle.y), radians(spinAngle.z)));
    #endif
#endif

    //get uv from the normal
    float u = atan2(moonFragNormal.z, moonFragNormal.x) / UNITY_TWO_PI;
    //to get around this we take the frac of this u value because these values are the same at the boundary but the frac value doesnt have the seam
    float fracU = frac(u);

    //so then we just pick which of the u values we want, the -0.001 just makes it favor the original one
    //to get the y we use acos which returns the same as atan. using acos is better than asin because asin causes warping at the poles
    float2 moonUV = float2(
                    fwidth(u) < fwidth(fracU) - 0.001 ? u : fracU,
                    acos(-moonFragNormal.y) / UNITY_PI
    );

    //if our sphere tracing returned a positive value we have a moon fragment
    if(sphere >= 0.0){
        //so we grab the moon tex and multiple the color
        float3 moonTex = tex2D(_MoonTex, moonUV).rgb * _MoonColor.rgb;

        //then we lerp to the color be how much of the moon is lit
        moonTex = lerp(col.rgb, moonTex * NDotL, saturate(NDotL));

        //then lerp to the final color masking out anything uner the horizon and anywhere there is clouds as they should be infron of the moon
        col.rgb = lerp(col.rgb, moonTex, horizonValue);
    }
Now we have phases of our moon
And with that we have completed the moon part of our shader. Our moon can orbit, rotate, and have different phases, and it is all user controlled. You can get the shader finished up to this point here and you can find the textures used here. Next we will wrap up by adding some clouds to our sky box.
Part 5: Clouds
The clouds for our shader will be generated from a noise texture. The look of your clouds will largely depend on the texture you use. I made mine in Gimp. My process was to start with a blank square image. Then go to Filters > Render > Noise > Solid Noise. In the settings check tileable and turbulent. Then turn the detail way up, I set mine to 10. Then mess with the scale and seed until you are happy. Then go over to Colors > Brightness-Contrast and play with the contrast setting to your liking. I did this to create more space between the bright areas in the texture, which leads to space between the clouds in our sky. I ended up with this, but experimentation here will yield different results.
Cloud noise texture used for our skybox.
To add some extra detail to our clouds we will also sample a normal map and do some basic faux lighting. To do this we will use another noise texture. Make a second noise texture but use different settings so we get different details than our first texture. Then in Unity, change the import settings to normal map, check the Create from Grayscale and adjust the bumpiness to your liking, I set mine to 0.15. Here is the texture I used for the normal map.
Cloud noise texture used for our cloud’s normals.
Now we can get to the actual cloud code. What we will do is sample our cloud texture twice but at different points and scale. We will do this for the normals
and the regular textures. To get uvs we will use the same method we did for our stars but with a separate _CloudBending property so that they can be
independent. To sample the textures at different points we will add some properties to control how the textures are scaled and translated over time and we will
add a property to control what direction they translate in. A lot of this could be adjusted to fit whatever particular effect you want to generate. Then once
we have our texture samples we will blend them
To blend these texture samples we will use some remapping of values, subtraction, and a smoothstep for our diffuse textures, and we will use Unity’s White out
blending function BlendNormals.
The idea behind the remapping is that our texture values range from 0 to 1. So, we can darken our final result by subtracting the second sample from our first
sample. But by remapping the value to be between two user-controlled values we can control how much our final result is affected by this blending. Then we will
smoothstep the result of this blending between two more user-controlled values to brighten the final result. So, to get started, add the following code
to our shader. We are adding a lot of properties to allow a lot of control over how the textures are sampled and then ultimately blended together.
    _SkyFadeStart("Sky Fade Start", Range(-1, 1)) = .05
    SkyFadeEnd("Sky End Start", Range(-1, 1)) = -.05

    [Header(Clouds)]
    _CloudDiffuse("Cloud Diffuse", 2D) = "black" {}
    [NoScaleOffset]_CloudNormal("Cloud Normal", 2D) = "bump" {}
    _CloudAlphaCutoff("Cloud Alpha Thresh", Range(0, 1)) = 0.2
    _CloudAlphaMax("Cloud Alpha Max", Range(0, 1)) = .5
    _CloudNormalSpeed("Cloud Normal Speed", Range(0, 1)) = .1
    _CloudSpeed("Cloud Speed", float) = .001
    _CloudDirection("Cloud Direction", float) = 0
    _CloudBending("Cloud Bending", Range(0, 1)) = .25
    _CloudBlendSpeed("Cloud Blend Speed", float) = -.02
    _CloudBlendScale("Cloud Blend Scale", float) = 1
    _CloudBlendLB("Cloud Blend LB", Range(0, 1)) = .17
    _CloudBlendUB("Cloud Blend UB", Range(0, 1)) = .32

...

    uniform half _SkyFadeStart, _SkyFadeEnd;

    uniform sampler2D _CloudDiffuse, _CloudNormal;
    uniform float4 _CloudDiffuse_ST, _CloudNormal_ST;
    uniform float _CloudSpeed, _CloudBlendSpeed;
    uniform float _CloudNormalScale;
    uniform float _CloudAlphaMax, _CloudAlphaCutoff;
    uniform float _CloudBending;
    uniform float _CloudDirection, _CloudBlendScale, _CloudBlendLB, _CloudBlendUB, _CloudNormalSpeed;

...

        #if defined(UNITY_COLORSPACE_GAMMA) && !SKYBOX_COLOR_IN_TARGET_COLOR_SPACE
            col.rgb = LINEAR_2_OUTPUT(col);
        #endif

    //End of Unity Code

    //Clouds
        //by dividing the xz by the y we can project the coordinate onto a flat plane, the bending value transitions it from a plane to a sphere
        float2 cloudUV = normWorldPos.xz / (normWorldPos.y + _CloudBending);

        //this is just a simple way to rotate the direction the clouds will travel in
        float2 cloudDir = float2(1, 0);
        cloudDir.x = cloudDir.x * cos(radians(_CloudDirection));
        cloudDir.y = cloudDir.y * sin(radians(_CloudDirection));

        //sample the cloud texture twice at different speeds, offsets and scale, the float2 here just makes so they dont ever line up exactly
        float cloud1 = tex2D(_CloudDiffuse, cloudUV * _CloudDiffuse_ST.xy + _CloudDiffuse_ST.zw + _Time.y * _CloudSpeed * cloudDir).x * horizonValue;
        float cloud2 = tex2D(_CloudDiffuse, cloudUV * _CloudDiffuse_ST.xy * _CloudBlendScale + _CloudDiffuse_ST.zw - _Time.y * _CloudBlendSpeed * cloudDir + float2(.373, .47)).x * horizonValue;

        //we remap the clouds to be between our two values. This allows us to have control over the blending
        cloud2 = Remap(cloud2, float2(0, 1), float2(_CloudBlendLB, _CloudBlendUB));

        //subtract cloud2 from cloud1, this is how we blend them. We could also mulitple them but I like the result of this better
        float clouds = cloud1 - cloud2;

        //then we smoothstep the clouds at desired values, this allows us control the brightness and the edge of the clouds
        clouds = smoothstep(_CloudAlphaCutoff, _CloudAlphaMax, clouds);

        //do the same thing except we slow the speed because it can look wierd if moving to fast
        float3 cloudNormal1 = UnpackNormal(tex2D(_CloudNormal, cloudUV * _CloudDiffuse_ST.xy + _CloudDiffuse_ST.zw + _Time.y * _CloudSpeed * cloudDir));
        float3 cloudNormal2 = UnpackNormal(tex2D(_CloudNormal, cloudUV * _CloudDiffuse_ST.xy * _CloudBlendScale + _CloudDiffuse_ST.zw - _Time.y * _CloudBlendSpeed * _CloudNormalSpeed * cloudDir + float2(.373, .47)));

        //blend normals
        float3 cloudNormal = BlendNormals(cloudNormal1, cloudNormal2);

    //Moon
        float orbitAngle = _Time.y * _MoonOrbitSpeed;
Highlighted code here is code that was already in the shader. Included to provide a reference to where the code goes.
The idea behind the blending of our diffuse textures is that our texture values range from 0 to 1. So, we can darken our final result by subtracting the second sample from our first
sample. But by remapping the value to be between two user-controlled values we can control how much our final result is affected by this blending. Then we will
smoothstep the result of this blending between two more user-controlled values to brighten the final result. It isn’t any technical process,
it is more that it produces a result that I was happy with.
Now we need to include this in the final color of the pixel. I mentioned using faux lighting because we will just use the dot product of our cloud normal and an up vector to create lighting. I like this because then when the sun is set the light position does not affect the cloud color, but you could change it to use the light position or transition between either method.
We will also add day and night color properties that we will lerp between based off of the night value that we calculate earlier in the
fragment function. Then we can calculate the final color value by multiplying the faux lighting value by the color. Before this multiplication I did one more
remap on the lighting value to allow control over how much the lighting affects the color. I also added one more line where we divide our color by a user-controlled
value that is in between 0 and 1 to provide a bit of a final brightness control to the cloud color. Then all we have to do is lerp between the col
value and our cloud color by our cloud value calculated from the textures.
    [Header(Clouds)]
    _CloudDiffuse("Cloud Diffuse", 2D) = "black" {}
    [NoScaleOffset]_CloudNormal("Cloud Normal", 2D) = "bump" {}
    _CloudColor("Cloud Color", Color) = (1, 1, 1, 1)
    _CloudNightColor("Cloud Night Color", COLOR) = (.34, .34, .34, 1)
    _CloudAlphaCutoff("Cloud Alpha Thresh", Range(0, 1)) = 0.2
    _CloudAlphaMax("Cloud Alpha Max", Range(0, 1)) = .5
    _CloudColorBoost("Cloud Color Boost", Range(0, 1)) = 0
    _CloudNormalEffect("Cloud Normal Effect", Range(0, 1)) = .37
    _CloudNormalSpeed("Cloud Normal Speed", Range(0, 1)) = .1
    _CloudSpeed("Cloud Speed", float) = .001
    _CloudDirection("Cloud Direction", float) = 0
    _CloudBending("Cloud Bending", Range(0, 1)) = .25
    _CloudBlendSpeed("Cloud Blend Speed", float) = -.02
    _CloudBlendScale("Cloud Blend Scale", float) = 1
    _CloudBlendLB("Cloud Blend LB", Range(0, 1)) = .17
    _CloudBlendUB("Cloud Blend UB", Range(0, 1)) = .32

...

    uniform sampler2D _CloudDiffuse, _CloudNormal;
    uniform float4 _CloudDiffuse_ST, _CloudNormal_ST;
    uniform float _CloudSpeed, _CloudColorBoost, _CloudBlendSpeed;
    uniform float3 _CloudColor, _CloudNightColor;
    uniform float _CloudNormalScale, _CloudNormalEffect;
    uniform float _CloudAlphaMax, _CloudAlphaCutoff;
    uniform float _CloudBending;
    uniform float _CloudDirection, _CloudBlendScale, _CloudBlendLB, _CloudBlendUB, _CloudNormalSpeed;

...

    //blend normals
    float3 cloudNormal = BlendNormals(cloudNormal1, cloudNormal2);

    //we blend the normal with the up vector. This dot product with up gives the final color the effect the clouds are fluffy
    float NdotUp = dot(cloudNormal, float3(0, 1, 0));

    //adjust the color for night
    float3 cloudColor = lerp(_CloudColor, _CloudNightColor, night);

    //then remap the dot product to be between our desired value, this reduces the effect of the normal
    cloudColor = cloudColor * Remap(NdotUp, float2(-1, 1), float2(1 -_CloudNormalEffect, 1));

    //then divide by the color boost to brighten the clouds
    cloudColor = saturate(cloudColor / (1 - _CloudColorBoost));

    //finally lerp to the cloud color base on the cloud value
    col.rgb = lerp(col.rgb, cloudColor, clouds);
The last thing we have to do is just to mask out everything properly now that all of the added features are in place. For the moon we will change the final
lerp to lerp by the horizon value multiplied by 1 minus the cloud value. And to the stars we will change how much of the stars value gets added
by multiplying it with 1 - the clouds value. This should mask everything out nicely.
    //so we grab the moon tex and multiple the color
    float3 moonTex = tex2D(_MoonTex, moonUV).rgb * _MoonColor.rgb;

    //then we lerp to the color be how much of the moon is lit
    moonTex = lerp(col.rgb, moonTex * NDotL, saturate(NDotL));

    //then lerp to the final color masking out anything uner the horizon and anywhere there is clouds as they should be infron of the moon
    col.rgb = lerp(col.rgb, moonTex, horizonValue * (1 - clouds));

...

    //then adjust the final color
    stars -= twinkle;
    stars = saturate(stars);

    //then lerp to the stars color masking out the horizon
    col.rgb = lerp(col.rgb, col.rgb + (stars * (1 - clouds)), night * horizonValue * (1 - step(0, sphere)));

    return col;
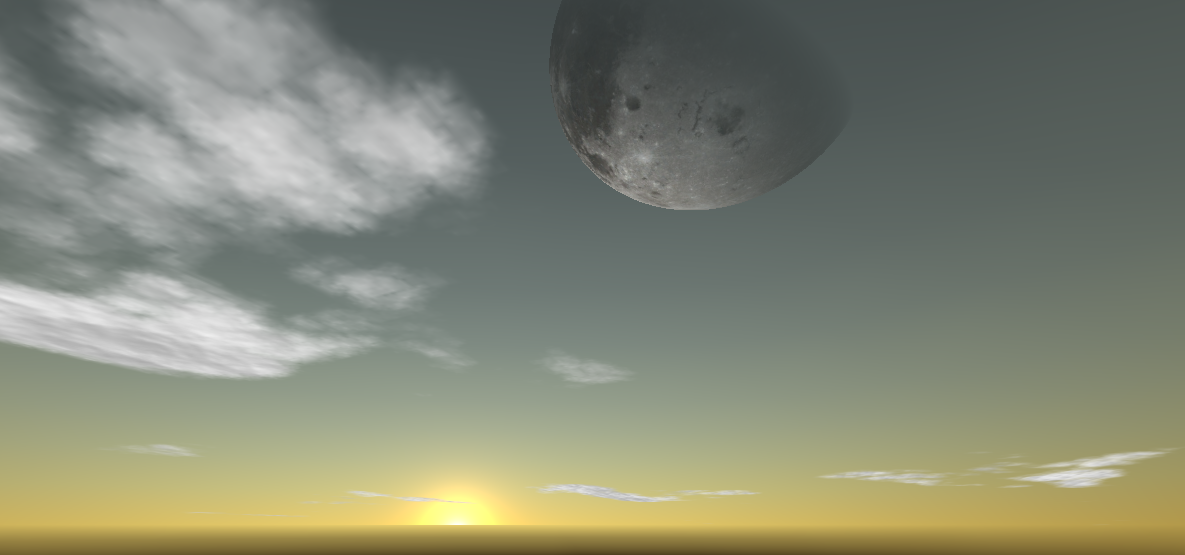
Our finished shader with clouds and moon visible
Part 6: Wrap up
And with that we have finished our modding Unity’s procedural skybox. We have added stars, clouds, and a moon. It is fairly customizable and can fit a variety of needs. I am sure somethings could be done differently and I would say feel free to experiment with it. A link to the final shader can be found here and all the textures that I used can be found here. I hope you found this helpful and maybe even useful.
If you have any comments or something did not work for you, contact me via my support page or DM me on twitter @Feral_Pug and I should respond to you soon. If you want to support me you can donate at ko-fi.com/feral_pug.